Connecting swap trigger and swap functions
Connect the swap trigger and swap functions with state and resource connections in the market maker diagram. Press play and make sure the swap trigger.
Connecting the Parts
We’re going to connect the swap trigger, the two swap functions and the liquidity pool until the whole model looks like this:
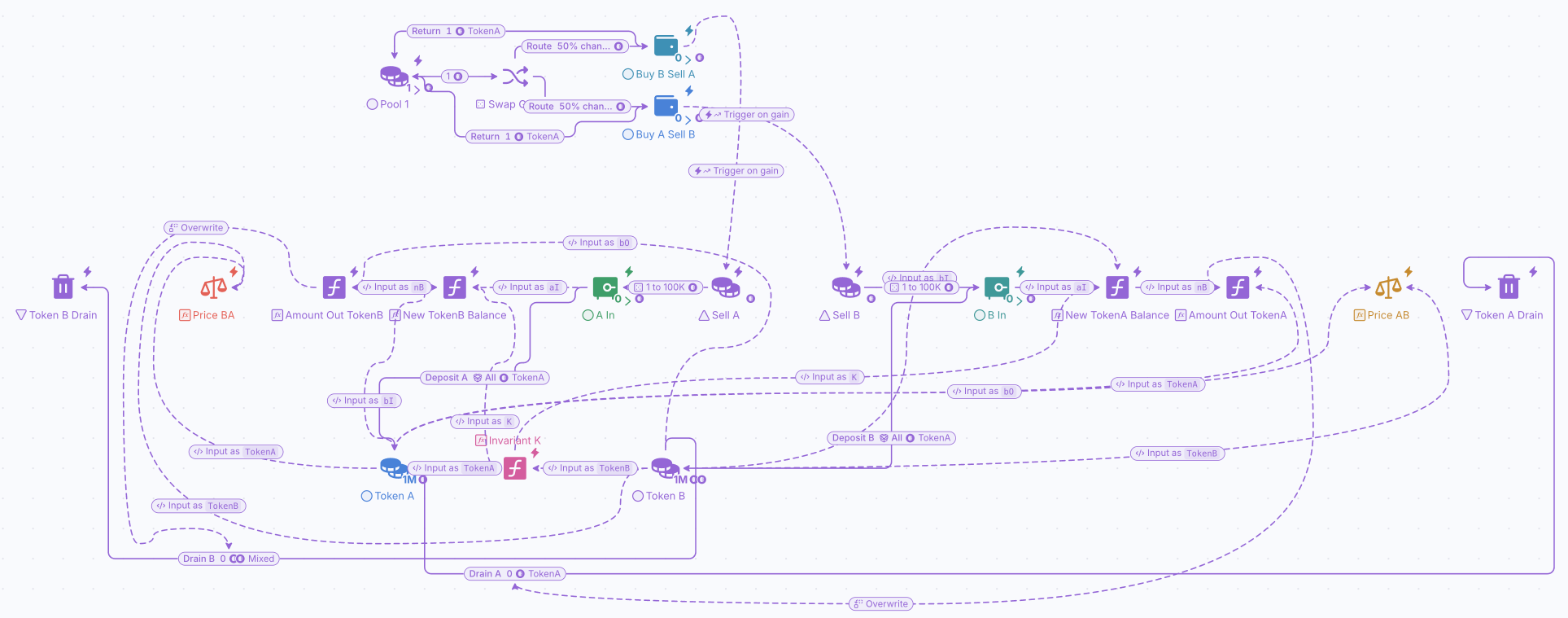
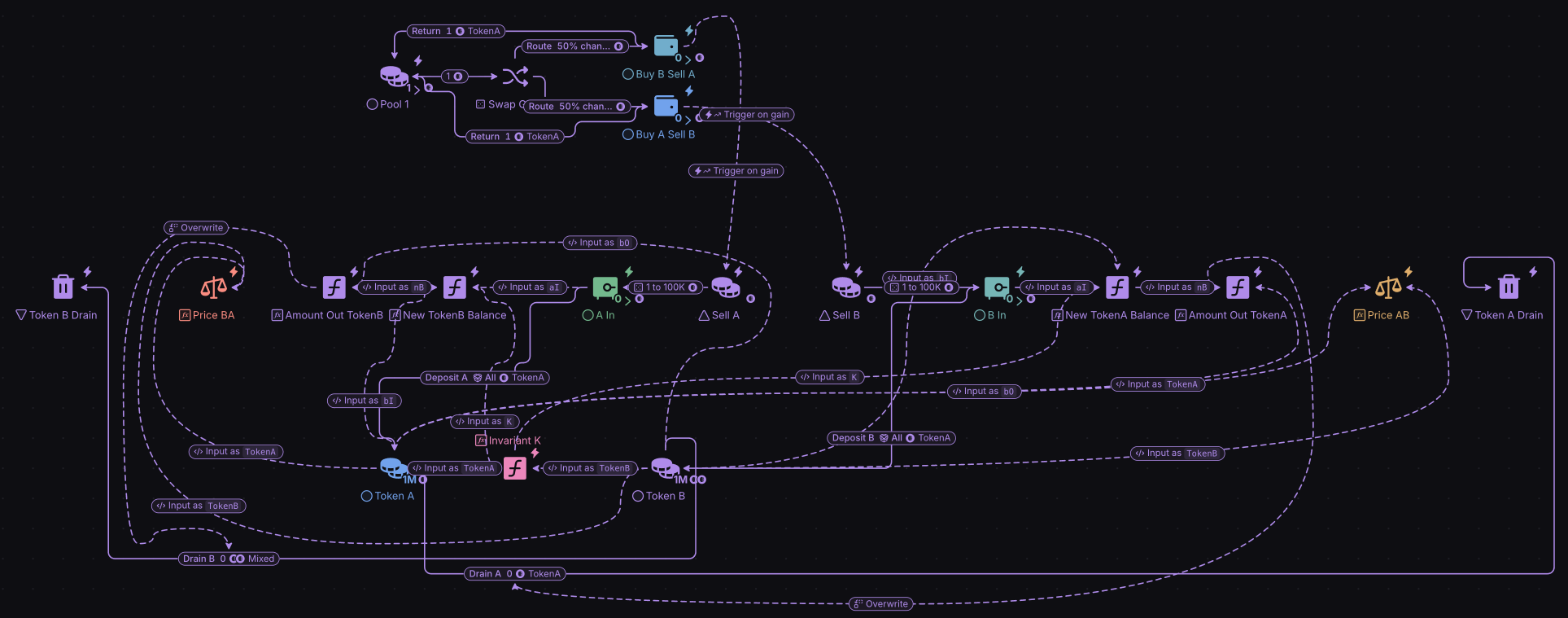
Lets Connect the Swap Trigger to the Swap Functions
Step1: (left side)
Connect a state connection from the Buy B Sell A Pool to the Source of the Buy B Sell A Swap Function. Settings:
- Type = Trigger
- Formula = Trigger on gain
Direction of flow = From Pool to Source
NOTE: A State Connection of the Type Trigger is a trigger, which means every time a resource comes into the pool, it will trigger the source on the other end of the state connection
Step 2:
Connect a state connection from the Buy A Sell B Pool to the Source of the Buy A Sell B Swap Function. Settings:
- Type = Trigger
- Formula = Trigger on gain
Direction of flow = From Pool to Source
It should look like this
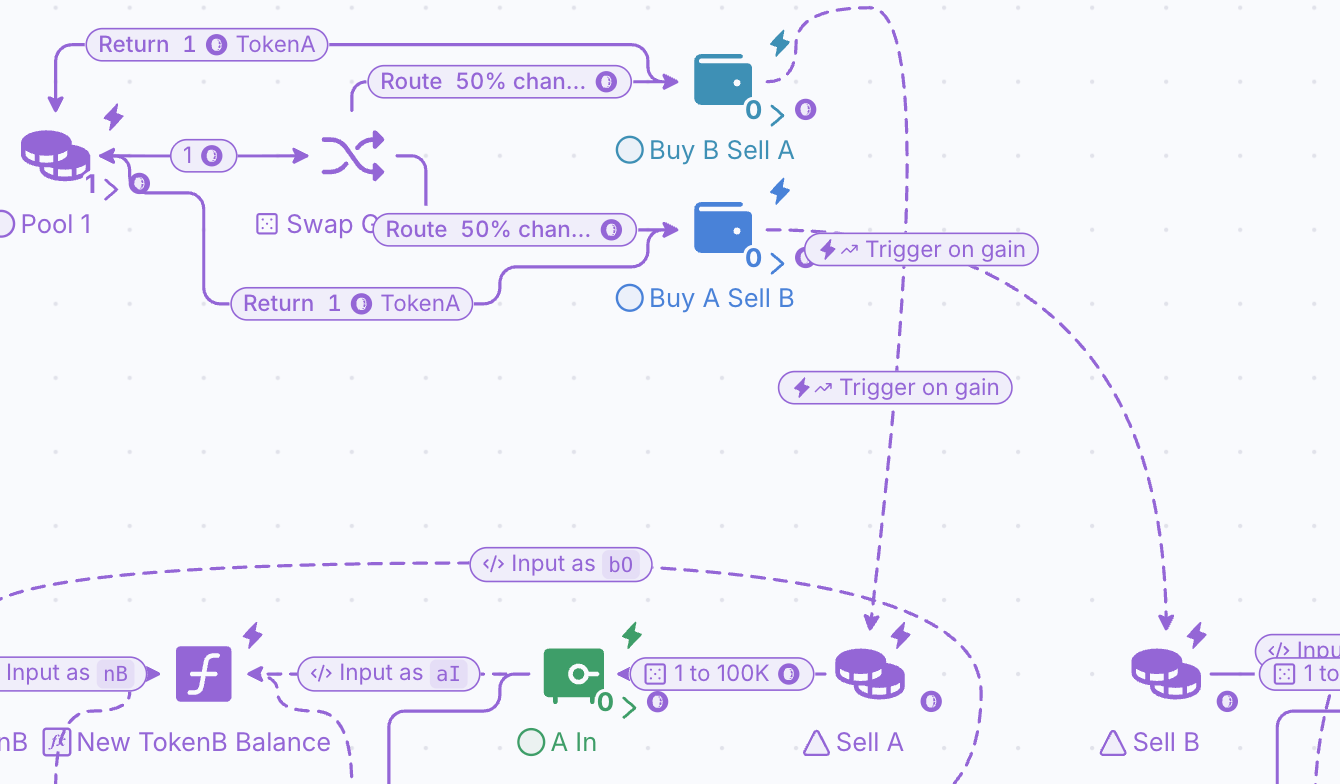
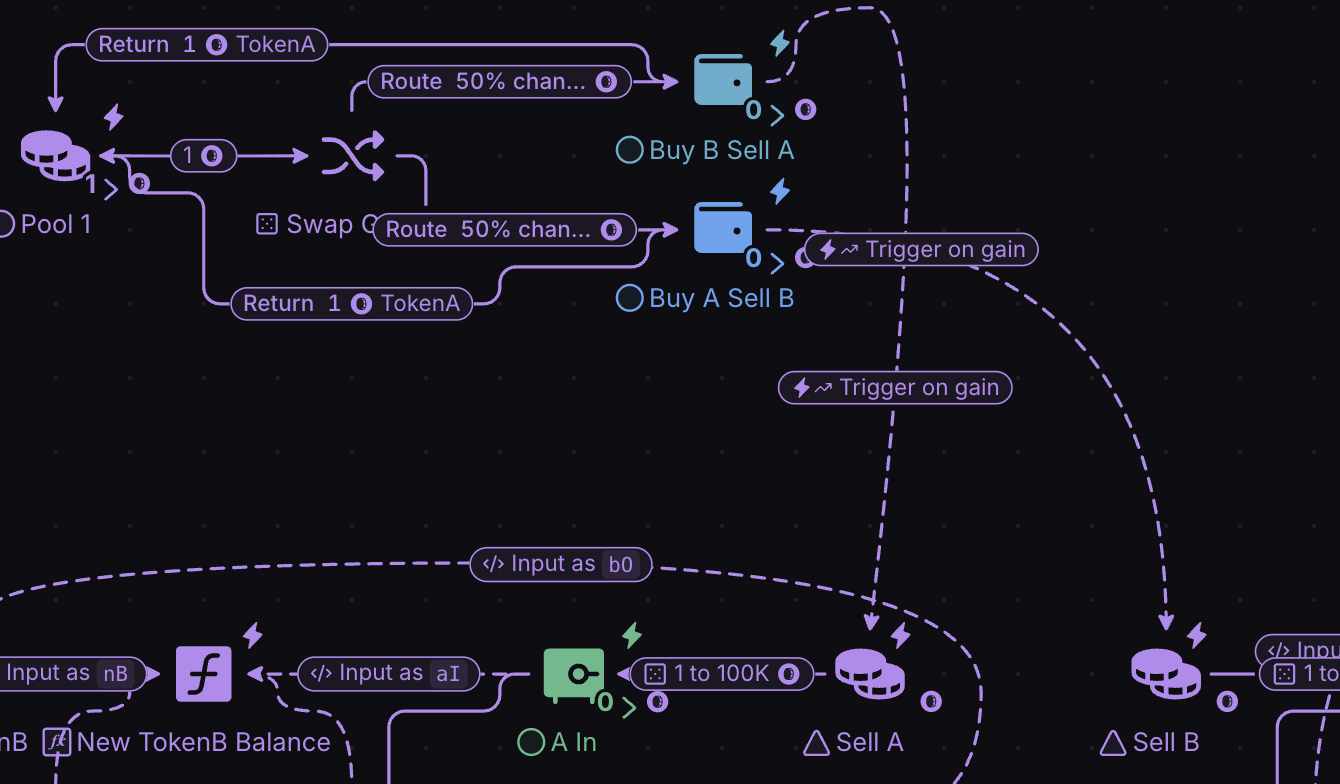
Time to test it out! Press play and make sure the swap trigger, triggers the source of the swap function
Lets connect the Swap function Swap A for B = Buy B & Sell A
Step 1:
Connect the Pool from the swap to the Token A pool of the liquidity pool, with a RESOURCE connection.
Settings:
- Type = All
Direction of Flow: from Pool in swap function to Token A Pool in the LP
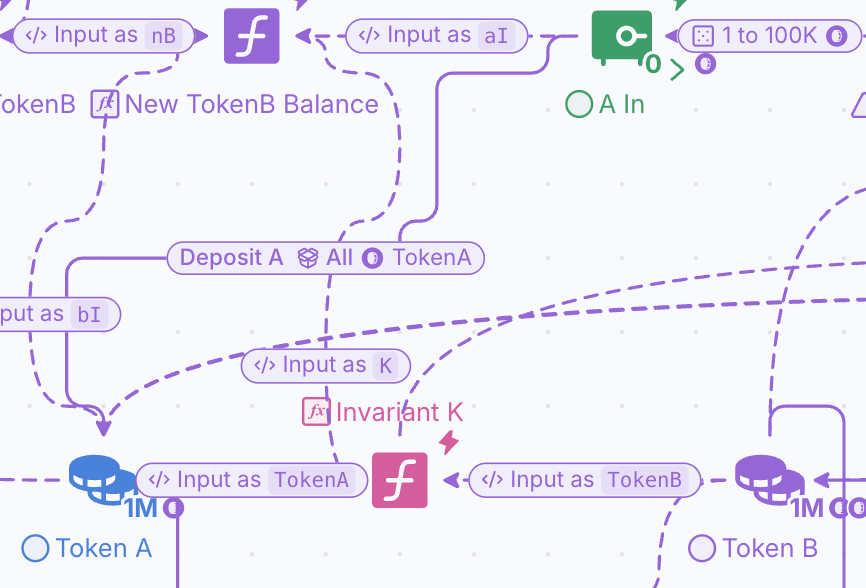
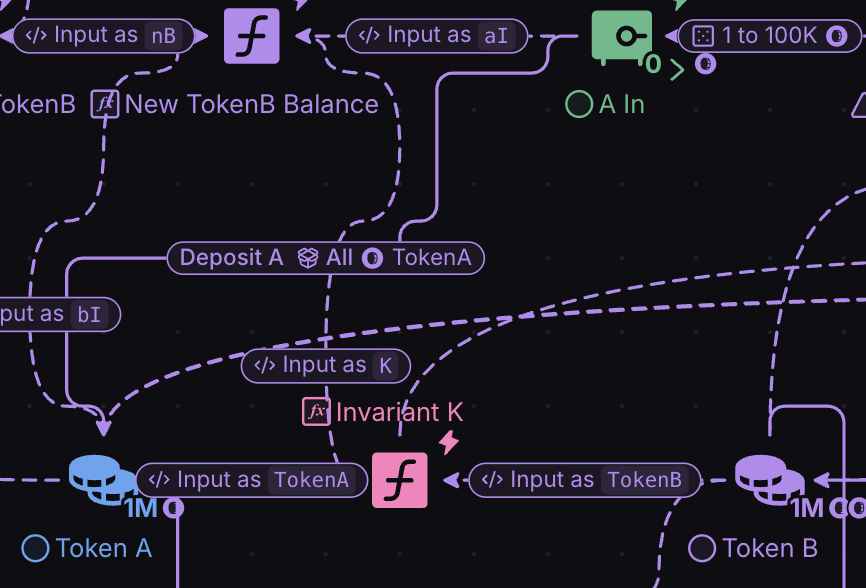
NOTE: in machinations “all” means all of the resources will be sent to the node at the end of the resource connection
Step 2:
From The Liquidity Pool, connect the Token A pool, to the new TokenB Balance Register, using a state connection. Settings:
- Formula = bI
Direction of Flow: From Token A Pool (LP) to Register (Swap Function)
NOTE: bI refers to balance in, we are referring to the token whose balance is coming in to the pool when the swap function is triggered
Step 3:
From the Liquidity Pool, connect the Invariant K Register to the New TokenB Balance Register with a state connector. Settings:
- Formula = K
Direction of Flow: From Register (LP) to Register (Swap Function)
NOTE: You may notice that now, our New TokenB Balance Register has all of the variables it needs to solve its equation K/(aI + bI)
Step 4:
From the liquidity Pool, use a state connection to connect the Token B Pool to the Amount Out Token B Register. Settings:
- Formula = bO
Direction of Flow: From TokenB Pool (LP) to Register (Swap Function)
NOTE: bO refers to balance out. It is referring to the token balance of the token that is leaving the liquidity pool (being bought)
Step 5:
From The Liquidity Pool, connect the Token A pool, to the Price BA Register, using a state connector. Settings:
- Formula = TokenA
Direction of Flow: From Token A Pool (LP) to Register (Swap Function)
Step 6:
From The Liquidity Pool, connect the Token B pool, to the Price BA Register, using a state connection. Settings:
- Formula = TokenB
Direction of Flow: From Token B Pool (LP) to Register (Swap Function)
NOTE: u now have all the variables you need for this register to complete its formula TokenB/TokenA
Step 7:
From The Liquidity Pool, connect the Token B pool, to the Token B Sink, using a RESOURCE connection. Settings:
- Type = Number, value 0
Direction of Flow: From Token B Pool (LP) to Sink (Swap Function)
NOTE: We are moving resources from the liquidity pool to out of it, therefore we need a resource connection. The value is 0 because we are going to be overriding it with a formula in the next step
Step 8:
From the swap function, connect the Amount Out TokenB register to the RESOURCE connection that is flowing to the Token B Sink. Settings:
- Type = Change value
- Formula = Overwrite
Direction of Flow: From Amount Out Token B Register (Swap function) to Resource connection
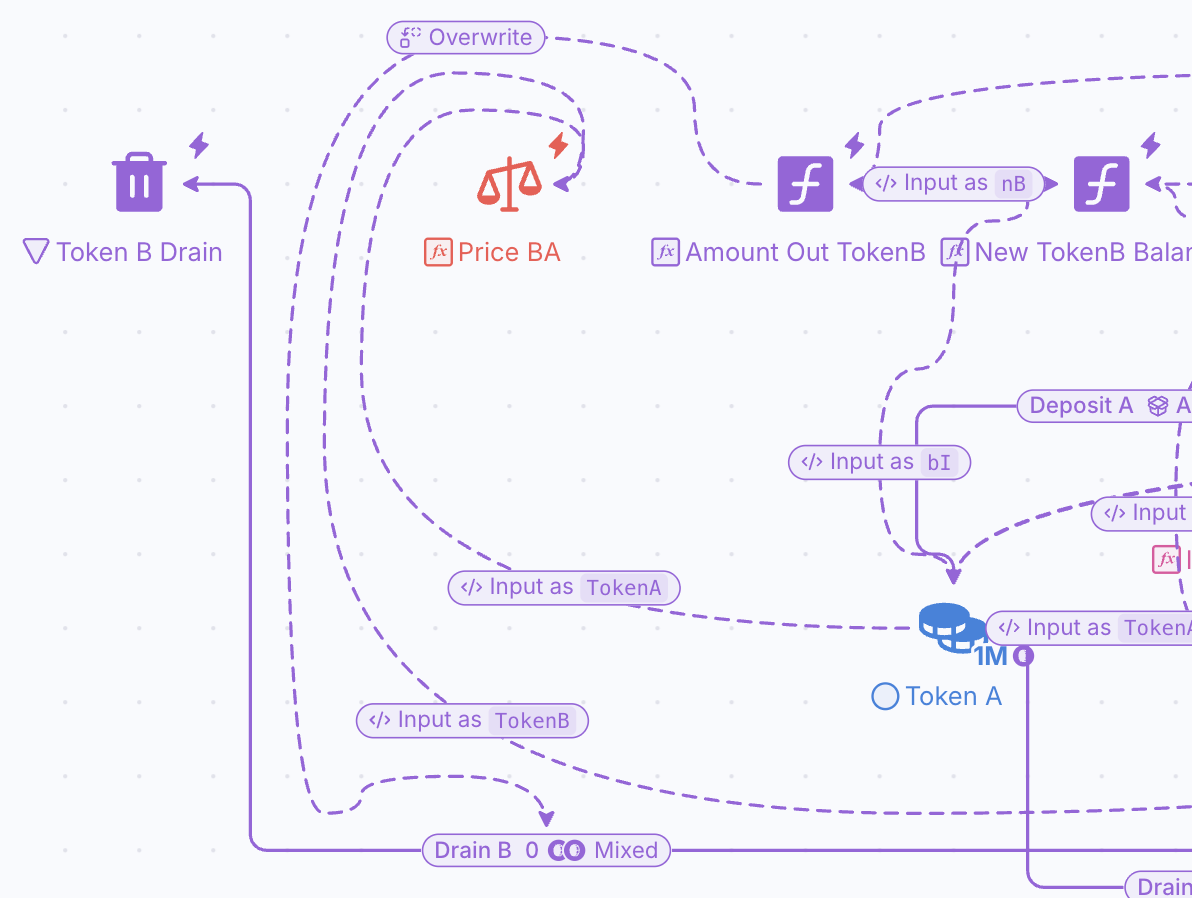
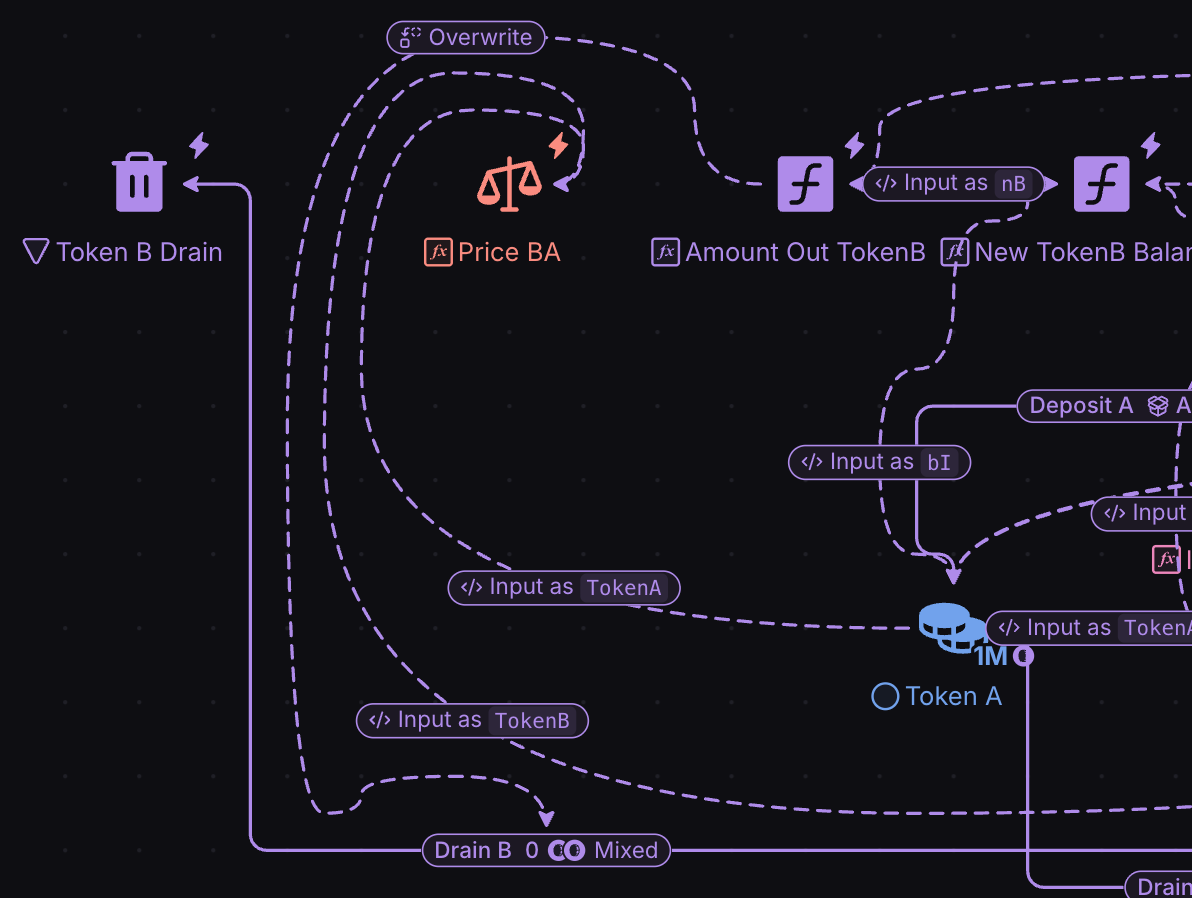
NOTE: Overwrite in a state connector means override. It will override the number in the resource connection with the value from the register it originates from.
Great Job! now everything should be connected for the swap function Buy B & Sell A, so lets test it out, press play and u should see this swap action working, if not, go back and see whats wrong. when it works perfectly, we can do the other side