Interface basics
Get oriented in the Machinations workspace with an annotated screenshot of the editor, and find the current controls in the interface reference.
The Machinations workspace is where you build and inspect a diagram. Before adding components, take a moment to find the canvas, the controls around it and the places where you can inspect a model.
The workspace at a glance
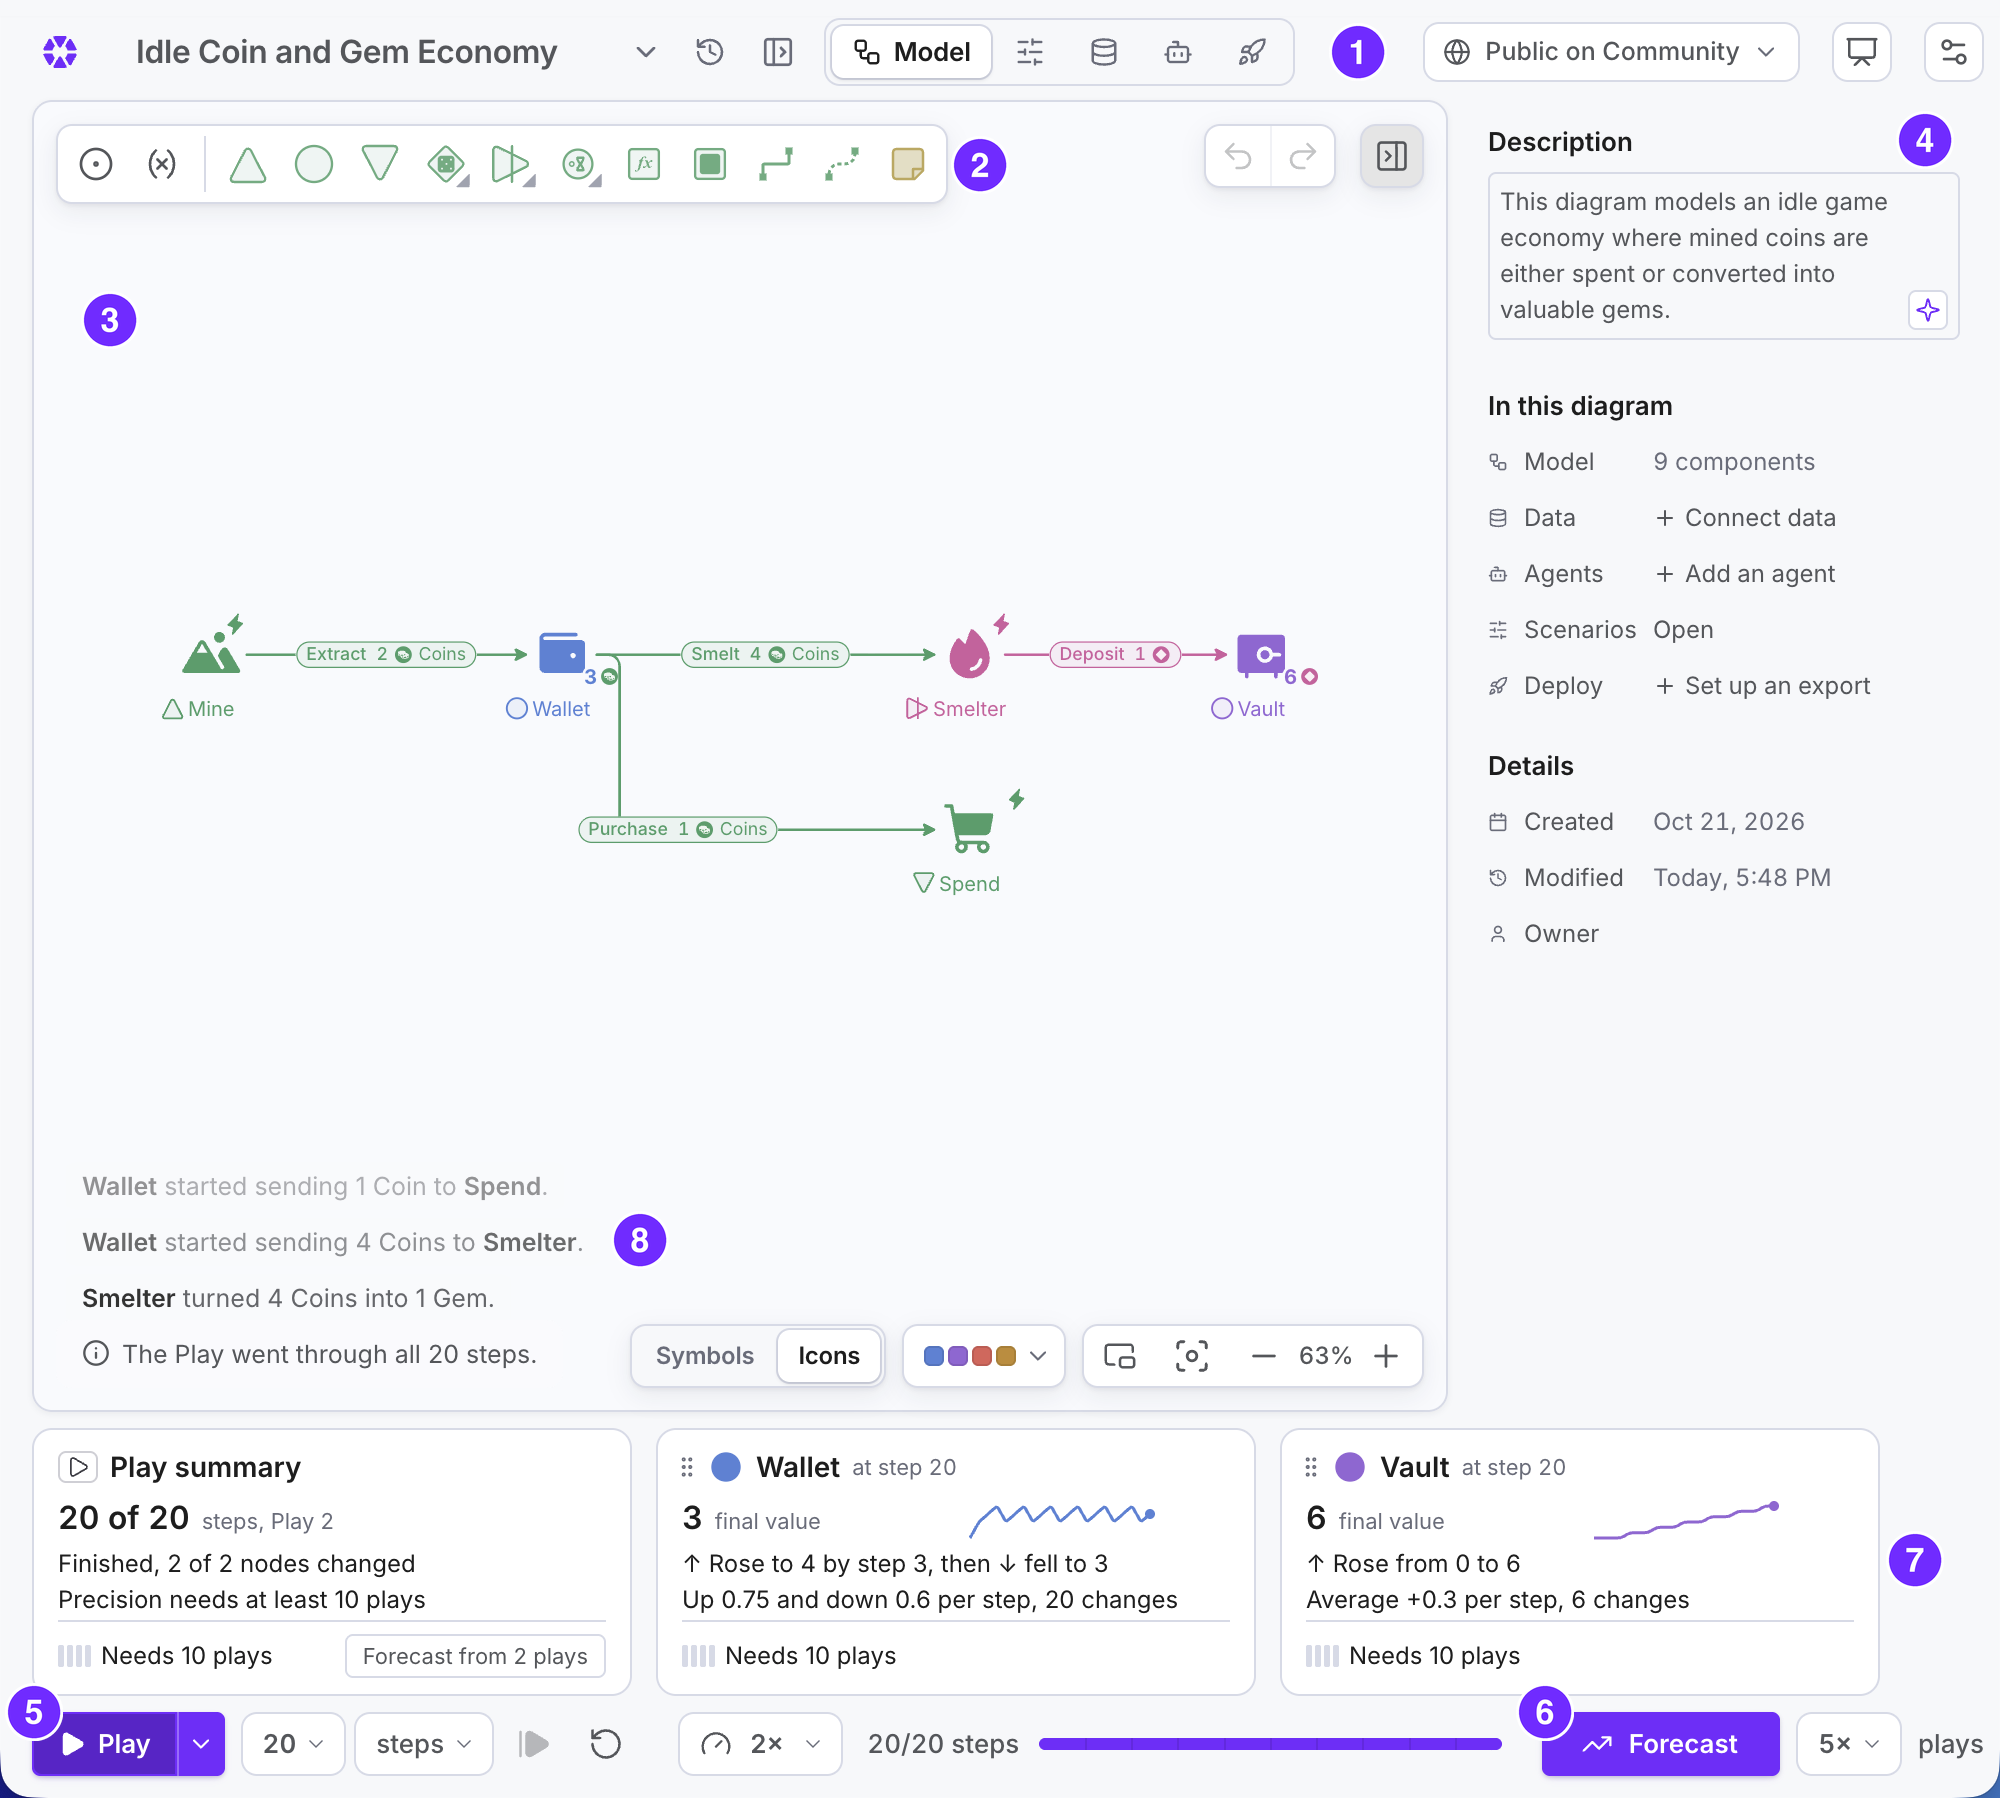
- Header tabs. Model, Scenarios, Data, Agents and Deploy switch between the parts of a diagram; the open tab shows its name.
- Component toolbar. The floating toolbar above the canvas holds the components you add to a model.
- Canvas. The space where you place components and connect them.
- Properties panel. It shows the settings of the selected component, with a Behavior summary in plain words and, for Pools and Registers, the Lever and Outcome switches. Switch on Lever to make a value adjustable in the Scenarios tab, where you can change it and Play or Forecast again without touching the diagram. With nothing selected, as here, it shows the diagram’s Description.
- Play. The Playbar’s Play button plays the model step by step. The small arrow on the Play button renames a Play (for example Game or Season) and suggests matching step words. Beside it you set how many steps a Play lasts, the unit that counts them and the Speed of the animation.
- Forecast. The Playbar’s Forecast button plays the model many times and collects the outcomes; the menu beside it sets how many Plays.
- Result cards. Under the canvas, the Play summary and one card for each component you track as an Outcome.
- Runtime log. At the bottom of the canvas, a plain-words account of what happened during the Play.
The Agent panel builds and edits the open diagram from a request in plain words.
Use the interface reference
For current controls and shortcuts, open the interface basics documentation. Keep it nearby as you work through the next lessons.