Sinks & end conditions
In this section, we will explain how Sinks & End Conditions work, by using a food and hunger mechanic. First, create a new type of resource that can be looted.
Currently our model has no lose condition or inherent challenge. To demonstrate how Machinations can be used to model these, we will build a food and hunger mechanic.
First, create a new type of resource that can be looted: Food.
Adding a Sink
We will use a Sink to model the consumption of the Food by the player and workers.
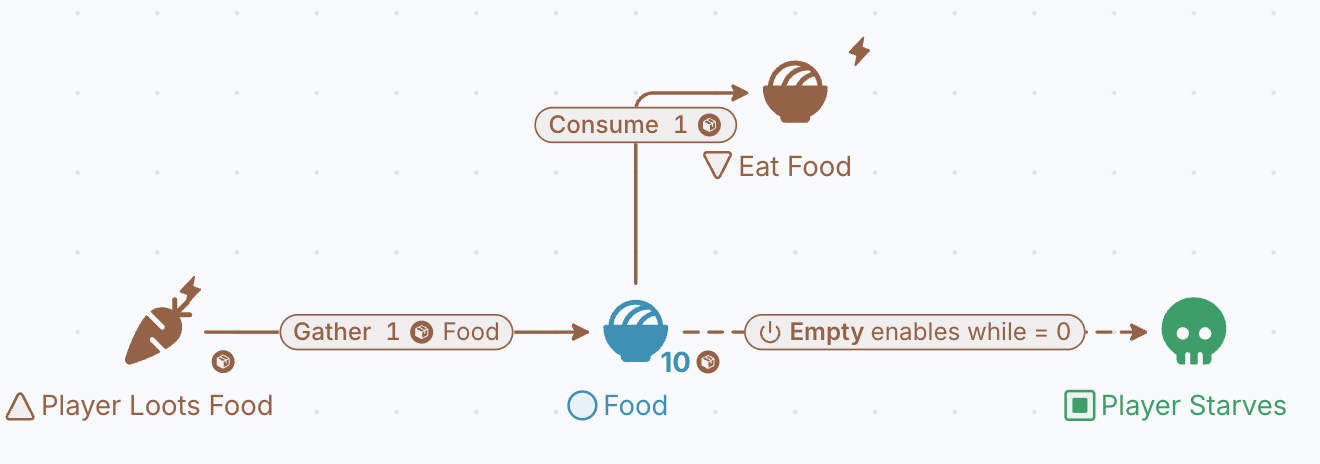
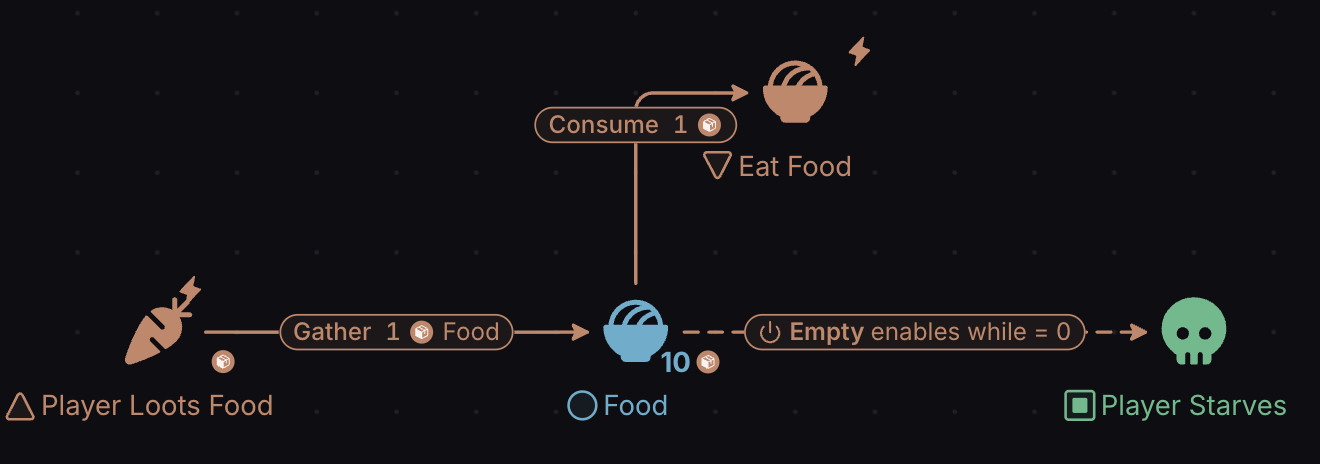
Sinks are resource-destroyers. They are often used for decay-like mechanics, like taking damage or losing hunger points.
Locate the Sink on the toolbar, add it to the canvas, and connect it to the Food Pool. Then hit Play.
Remember, the Sink must be on Auto (a new Sink already is), otherwise the Food won’t be drawn out of the Pool.
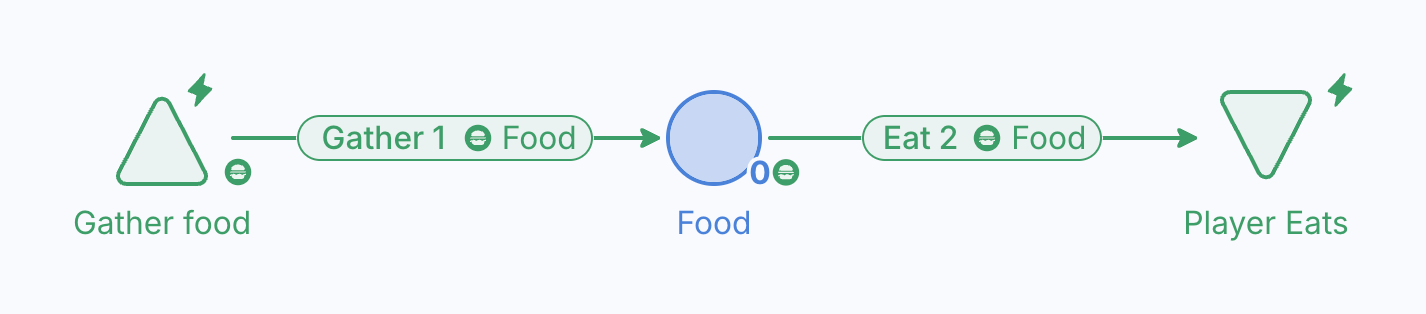
Design consideration: In this model Player Loots Food gathers 1 Food each step and Eat Food takes 1 each step, so the Food pool stays close to where it started and the player never runs short. Changing either amount changes how long the player survives.
We keep the food requirement simple: Eat Food takes the same 1 Food each step however many workers have been hired. To make workers eat too, you could add a Modifier-type State Connection from Workers Employed to the connection that feeds Eat Food, but this model does not include one.
Adding an End Condition
The end condition of our game would be when the player runs out of food and starves. For simplicity, we will assume that Workers can’t starve (although this is something that can be modeled).
For quick tests of our model, we can use a component called an End Condition to flag when the player has starved.
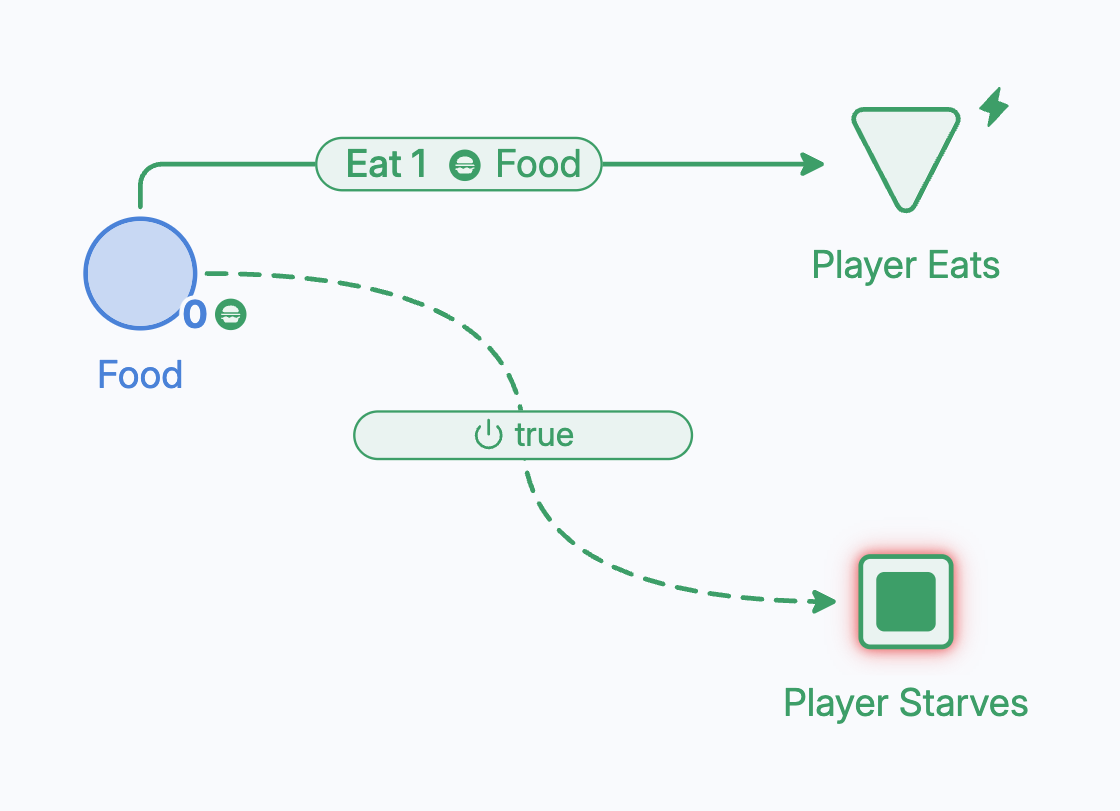
End Conditions take Activator-type State Connections (Type “Enable while”) as an input. When the condition given is met, the Play ends.
Try implementing an End Condition yourself before continuing.
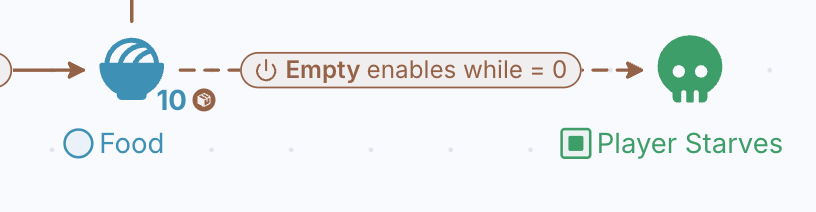
This setup checks if the player has no food left, then ends the Play.
Notice we have a problem: playing this model will instantly end the Play. This is because the player has no Food to start off with.
Adding initial Food
We can solve this problem by giving the player some food to start the game with.
- To do this, select the Food pool and set its Initial quantity to 10 in the Properties panel.
While you Play, a Pool shows how many resources it holds as a number inside its circle.
You now have a working diagram representing a small slice of a resource management game. Though more can be done to the diagram to improve its utility and accuracy, it has already been able to identify some balance issues. For instance, Wood and Stone tend to be overproduced (or under-consumed).
This diagram would be a starting point for a larger, more feature-complete diagram; or for new diagrams which model individual features in more detail.
Next, we will explore how Charts can be used to plot your Plays and identify further balance issues.